
Images to PDF
Set page dimensions, margins and placement for JPGs and PNGs, and inspect exactly what the exported page will show.
Screenshots show the real app with sample documents. Select an image to inspect the original capture.
Start with image pages
Add a JPG or PNG through Add files, or drop it onto the workspace. You can combine images with PDF pages in the same arrangement. Each imported image becomes a page; it does not become editable PDF text or acquire OCR.
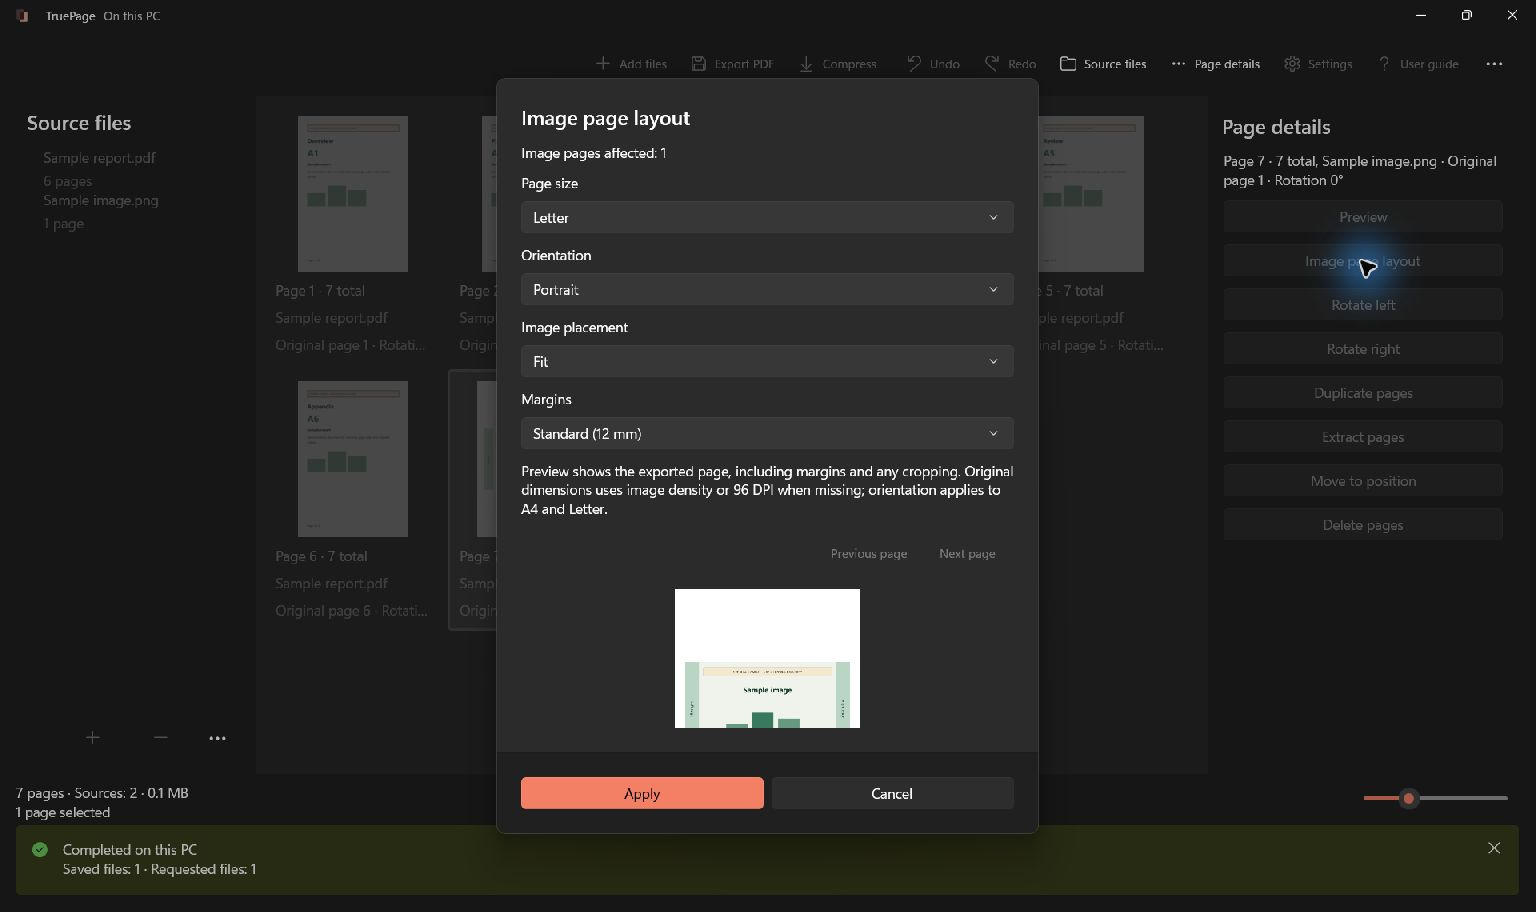
Select the image page or pages, then open Image page layout from the toolbar overflow or Page details. If PDF pages are selected too, the layout applies to the selected image pages only. Check the affected-page count in the dialog.
Choose dimensions and placement
- Set Page size to A4, Letter or Original dimensions. The initial A4/Letter choice follows regional settings.
- For A4 or Letter, choose Portrait or Landscape. Orientation is not available for original dimensions.
- Choose Fit, Fill (crop) or Center without enlargement.
- Set margins to None, Small (6 mm) or Standard (12 mm).
- Inspect the preview and displayed dimensions. When several images are selected, use previous/next controls to inspect each one.
- Select Apply to update the arrangement, or Cancel to leave it unchanged.
Understand the three placement choices
| Placement | What happens | Useful check |
|---|---|---|
| Fit | Keeps the whole image inside the usable page area, retaining its proportions. | Expect empty space when the image and page have different shapes. |
| Fill | Fills the usable area by cropping parts of the image that do not fit. | Check dates, signatures and content near every edge. |
| Center without enlargement | Keeps a smaller image centered without enlarging it; reduces an oversized image to fit. | Expect a small source image to occupy only part of the page. |
The preview includes the chosen margins and crop. It is the place to decide whether a neat edge is worth losing content. For documents and receipts, start with Fit unless you have a specific reason to crop.
Original dimensions and multiple images
Original dimensions use the image’s density metadata; when that is missing, TruePage uses 96 DPI. This can produce a surprisingly large page for a photograph with many pixels. Select A4 or Letter when you need a predictable paper size.
Margins reduce the usable area. If a small original page cannot accommodate them, choose smaller margins or a standard paper size. Applying settings to multiple images uses the same choices for all selected image pages, but different proportions can produce different crops. Inspect every affected image before applying Fill.
Image layout is a reversible workspace edit. Use Undo to reverse it. It does not resize or overwrite the original JPG or PNG. Rotating an image page changes its orientation in the arrangement and exported PDF.
Export and check
Choose Export PDF to produce the combined PDF, then open the result and check page dimensions and readability. Choosing a paper size does not invent image detail: a low-resolution scan may still look soft.
If an image cannot be decoded faithfully, save a copy as a standard JPG or PNG and import that copy. Animated images are not supported. For resource errors, reduce a copy’s pixel dimensions rather than overwriting your original.
Continue with PDF export. For the reverse operation, see PDF pages to images.